3 tips to write better Swift code
You’re more of a video kind of person? I’ve got you covered! Here’s a video with the same content than this article 🍿
I want to show you 3 tips that will help you write better Swift code!
Let’s start with tip number one!
# 01 – Multiline Strings
When we need a String to display over several lines, the standard approach is to add line breaks using the special character "\n"

While this works perfectly, it has the drawback of seriously degrading the readability of the code…
That’s when a nice feature of Swift called multiline strings comes in handy!
By using three double quotes instead of one, we turn our string into a multiline string.

Now we no longer need to use the special character "\n", we can just simply use regular line breaks and Swift will take them into account 👌
Let’s move on to the second tip!
# 02 – Opaque Arguments
You’ve probably already encountered the situation where you define a generic argument that is used only a single time, in the signature of the method.

While this kind of code is perfectly valid, since Swift 5.7 there’s actually a shorter syntax for it!
Instead of explicitly defining a generic argument, you can use the keyword some to use an Opaque Argument.
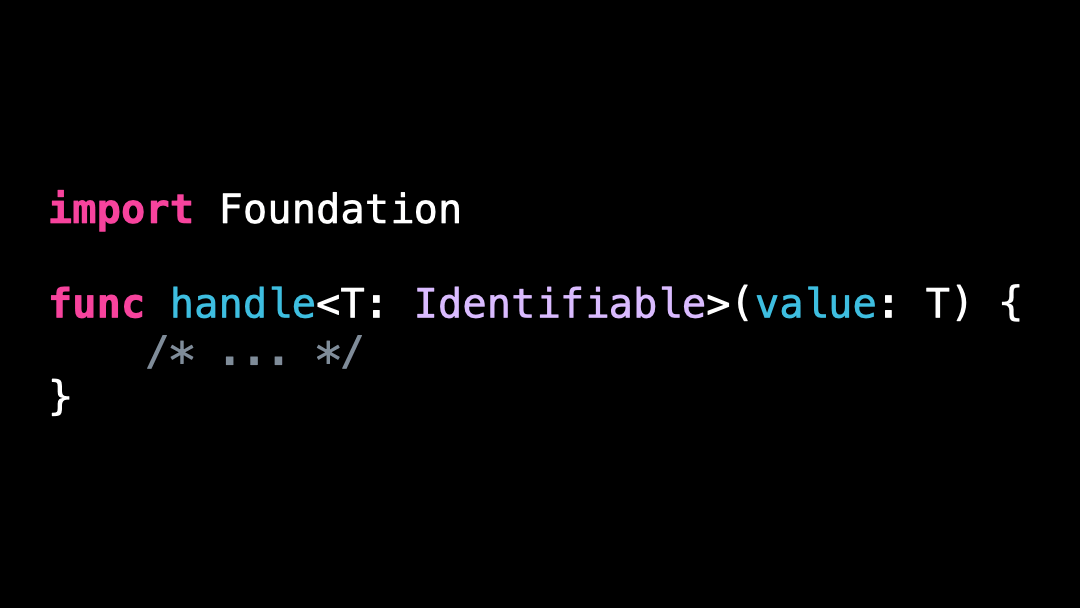
This new syntax is conceptually equivalent to the previous one.
The only difference is that the generic argument has now become anonymous, meaning we can’t refer to it afterwards.
But since we weren’t doing it in the first place, it’s no problem here 😌
Moving on to the last tip!
# 03 – Throwing in tests
Consider this code: we’re writing a test, and inside that test we need to call a function that can throw.

If you expect your test to fail when that function throws, then your first intuition might be to use try! when calling that function.
While this works, it comes with a significant drawback: when the function does throw, it will actually crash your entire test process.
That’s probably not what you want: you would more probably want the test to fail and have subsequent tests keep executing.
As it turns out this is quite easy to achieve!
We just mark our test with the keyword `throws` and thanks to this small change the test will now automatically fail when any unhandled error is thrown inside of it 😎

Conclusion
That’s it these were the 3 tips I wanted to share with you.
I hope you enjoyed them and that they will indeed help you write better Swift code.
Here’s the code it you want to experiment with it!
// #01 – Multiline String

let multilineString = """
1st line
2nd line
3rd line
"""

// #02 – Opaque Arguments

func handle(value: some Identifiable) {
    /* ... */
}

// #03 – Throwing Tests

class Test: XCTestCase {
    func test() throws {
        XCTAssertEqual(try throwingFunction(), "Expected Result")
    }
}