Ever heard of .contextMenu()?
You’re more of a video kind of person? I’ve got you covered! Here’s a video with the same content than this article 🍿
Advertisement

Sponsors like Stream really help me grow my content creation, so if you have time please make sure to check out their product: it’s a direct support to my content creation ☺️
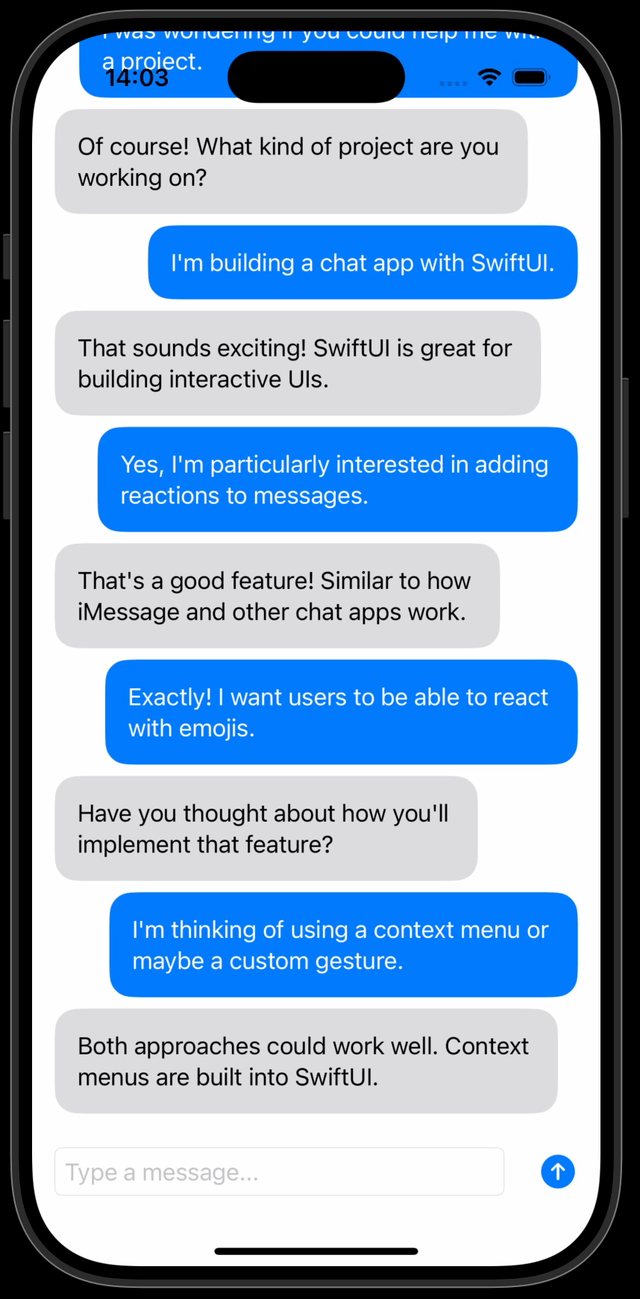
Let’s talk about this UI, that lets you add an emoji reaction to a chat message:
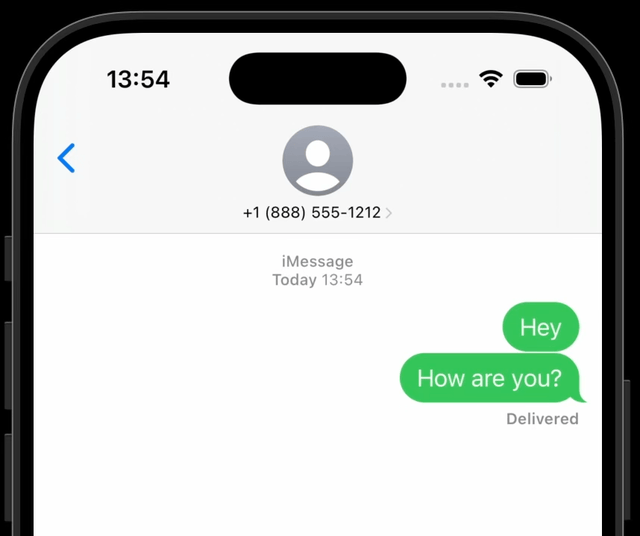
If someone asks you to build a UI like this one, I’m sure that you’ll quickly have a feeling that it won’t be an easy task!
Indeed, if we look at it more closely we can see that we’d need to implement buttons with custom shapes, several animations and even a transition to animate the chat message back and forth.
All that to say that there’s definitely at least a few days of work to build such a UI!
And this got me thinking: what if we tried to implement a simplified version, that would only use the built-in building blocks of SwiftUI?
Would it be possible to implement it quickly and with a result that still looks polished enough?
That’s what we’re going to see in this article!
We’re going to use an app that implements a very simple chat feature.
I will only show you the parts of the code that are relevant, however the full codebase is available on GitHub.
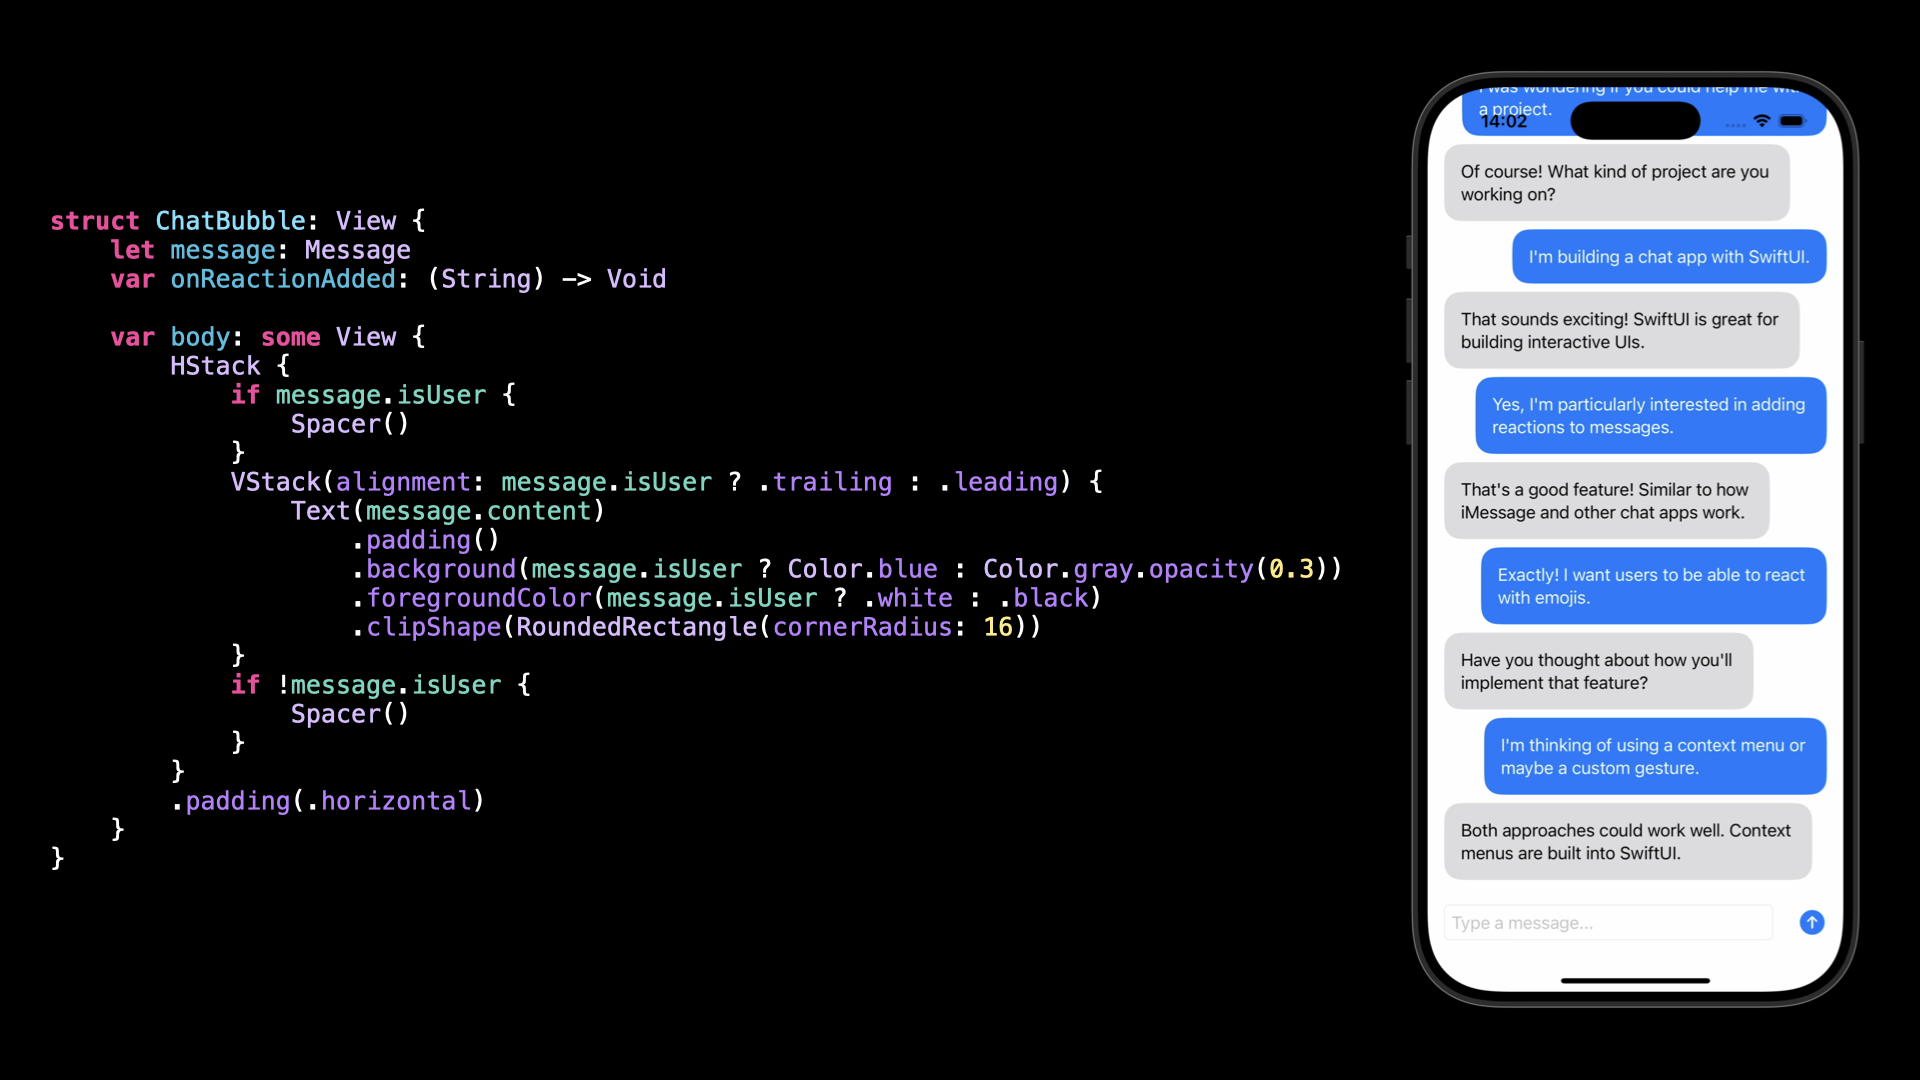
Let’s focus on the view ChatBubble, which displays each chat message.
To implement an emoji reaction, we need to display the UI when the user long presses on a chat message.
To do achieve this, let’s focus specifically on the VStack:

We’re going to use a built-in modifier of SwiftUI called .contextMenu():
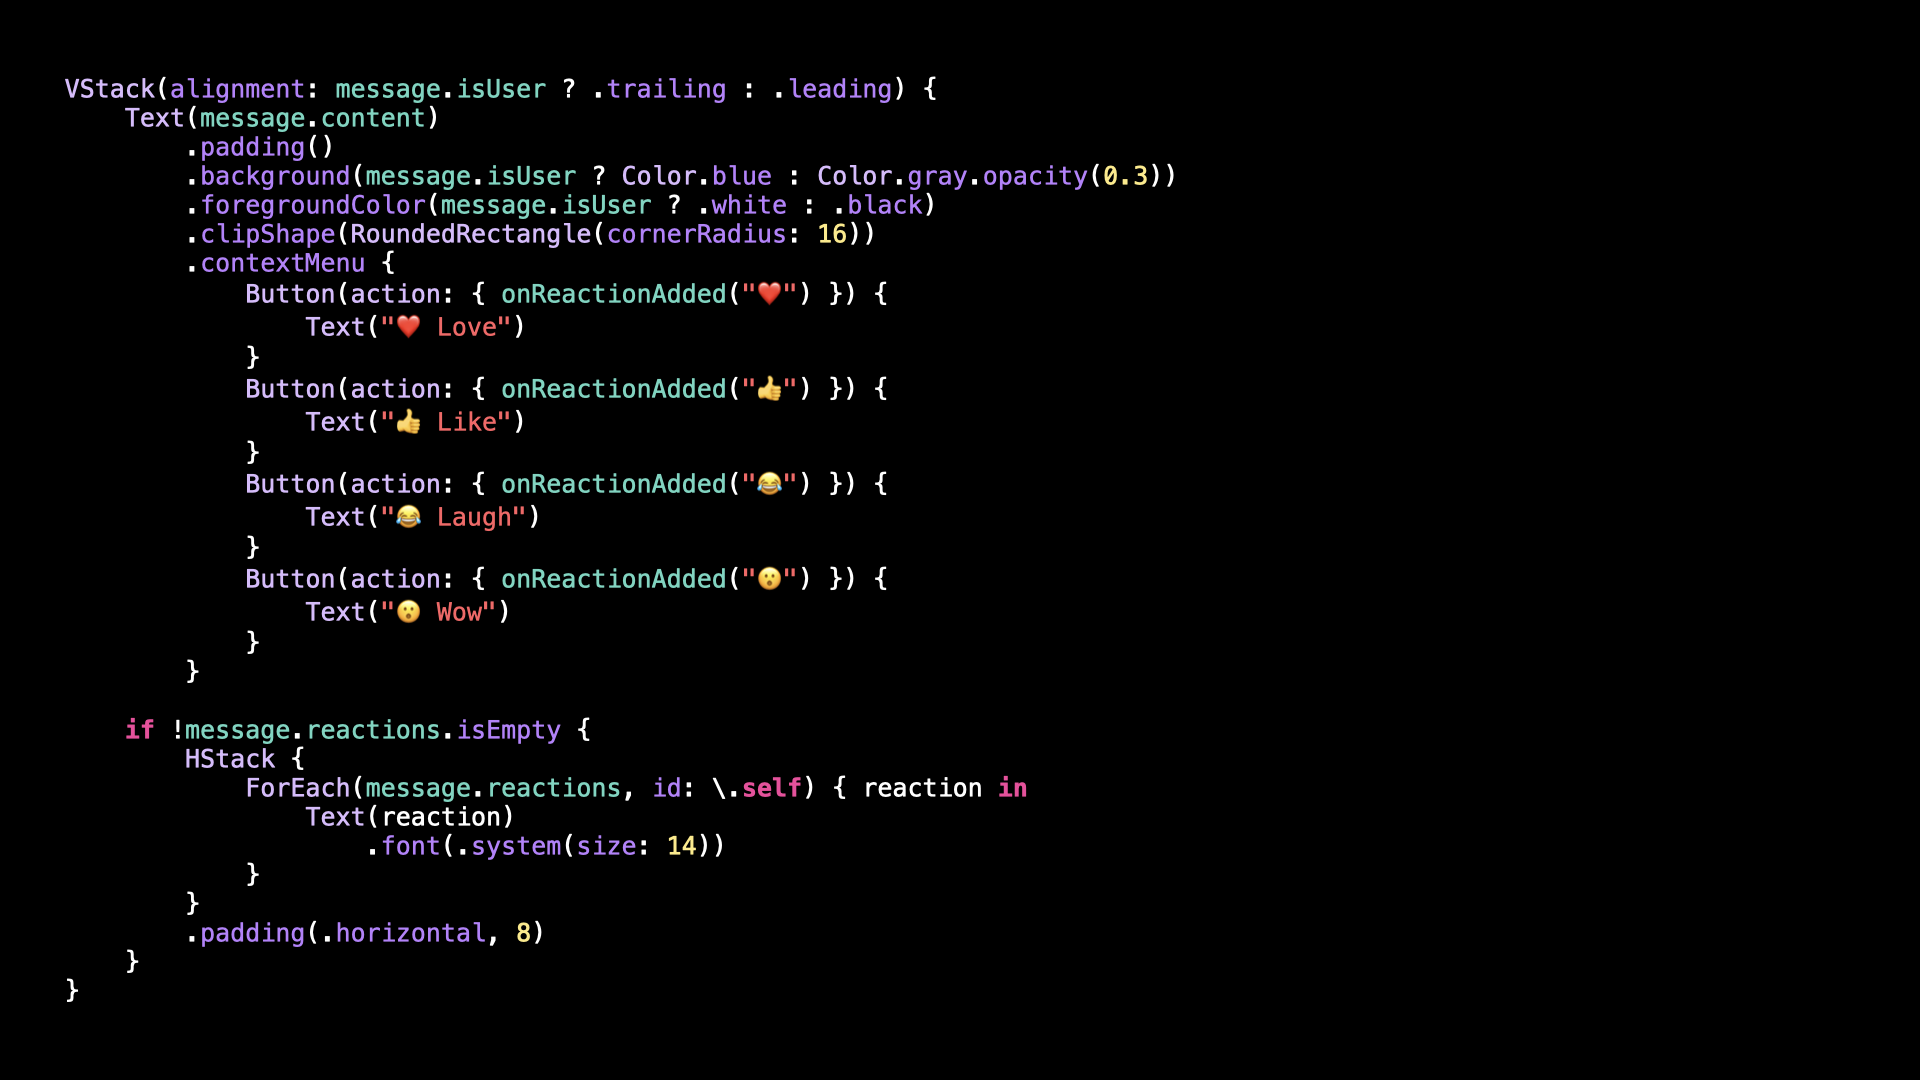
As its name suggests, this modifier lets us define a series of buttons, which will be displayed in a contextual menu when the user long presses on a ChatBubble.
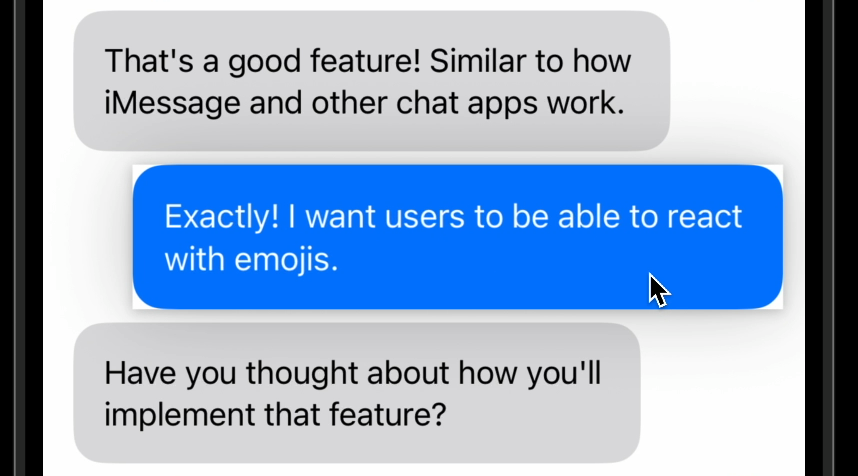
If we give it a try, we’ll see that indeed it works: we can add an emoji reaction:

However, notice that there’s an issue in the UI: when the user long presses on the ChatBubble, we can see a white rectangular shape appear behind the ChatBubble:
And that’s a problem we need to solve, because it really conveys a feeling of poor quality.
Fortunately, it’s quite easy to fix when you know the right modifier to call!
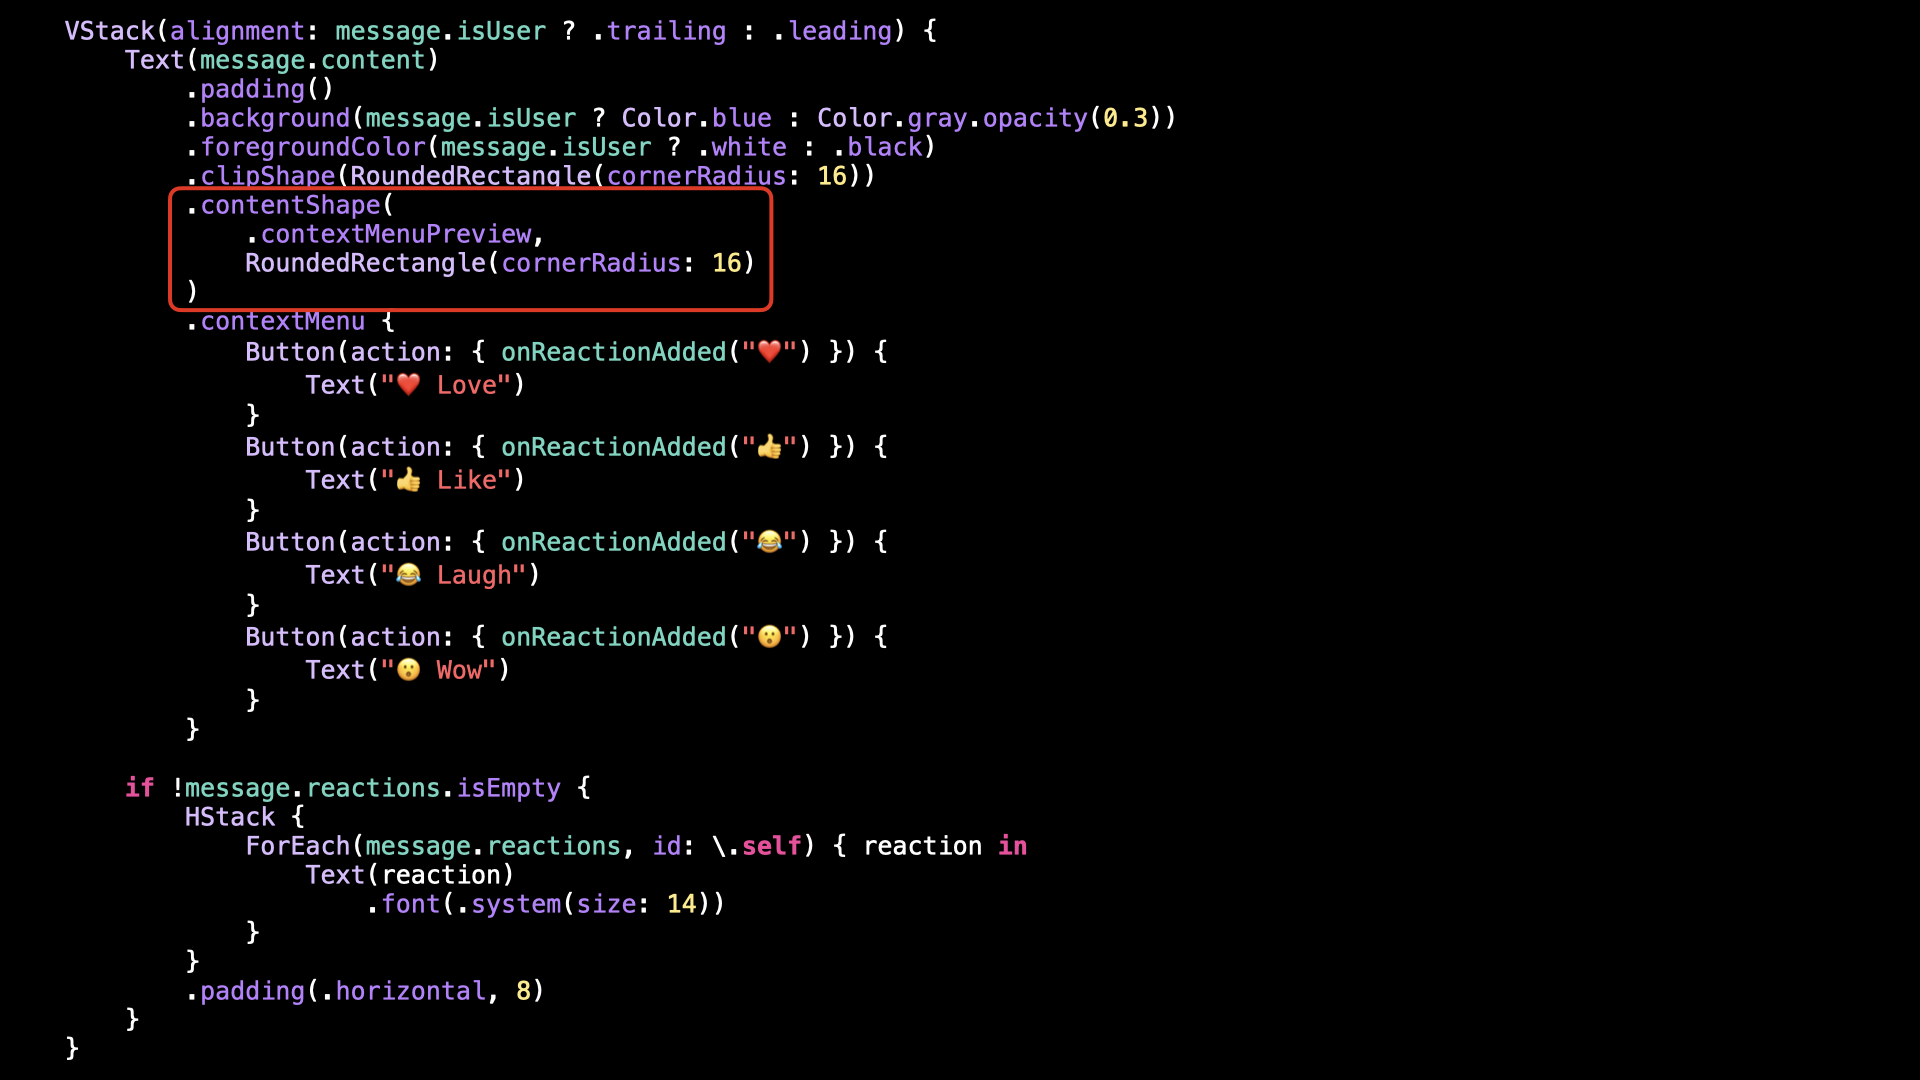
We’re going to use the modifier .contentShape().
We’ll pass it the same shape as for the modifier .clipShape(), however we’ll also specify that the shape should be applied for the .contextMenuPreview:
And as we can see, by using the modifier .contentShape() with the correct arguments, now the UI looks perfectly clean:
Of course, we could keep improving: for example by adding a small animation or a haptic feedback when the reaction is added.
But our goal has been achieved: we’ve been able to implement an emoji reaction feature using only SwiftUI built-in building blocks, and we saw that it didn’t require too much effort!
If you’re curious to see how to implement emoji reactions from scratch without using SwiftUI’s .contextMenu(), here’s a link to how Stream implemented the feature in their SDK: you’ll see that it indeed involves quite a bit of work!
That’s all for this article, I hope that you’ve enjoyed it!
Here’s the code if you want to experiment with it:
VStack(alignment: message.isUser ? .trailing : .leading) {
    Text(message.content)
        .padding()
        .background(message.isUser ? Color.blue : Color.gray.opacity(0.3))
        .foregroundColor(message.isUser ? .white : .black)
        .clipShape(RoundedRectangle(cornerRadius: 16))
        .contentShape(
            .contextMenuPreview,
            RoundedRectangle(cornerRadius: 16)
        )
        .contextMenu {
            Button(action: { onReactionAdded("❤️") }) {
                Text("❤️ Love")
            }
            Button(action: { onReactionAdded("👍") }) {
                Text("👍 Like")
            }
            Button(action: { onReactionAdded("😂") }) {
                Text("😂 Laugh")
            }
            Button(action: { onReactionAdded("😮") }) {
                Text("😮 Wow")
            }
        }

    if !message.reactions.isEmpty {
        HStack {
            ForEach(message.reactions, id: \.self) { reaction in
                Text(reaction)
                    .font(.system(size: 14))
            }
        }
        .padding(.horizontal, 8)
    }
}